Showing posts with label recipes. Show all posts

Monday, February 10, 2014

Homemade Turkey Non-Chimichanga Chimichangas Recipe

I'm not a huge Mexican food fan, but I do tend to make it a few times a month, as Handsome Husband is and it is one of the easier types of meals to whip up (though good and traditional Mexican cuisine is time consuming and takes skill I certainly don't possess, my mediocre Mexican meals work for us!).

When I saw this recipe for baked chimichangas, I knew I wanted to give it a try!  I did not end up following the recipe very closely, so today I'll share with you the "chimichangas" that I made, which I am calling Non-Chimichangas because I baked them for such a short amount of time, they were really more like super yummy burritos!  Yummy is all that mattered to me, and they were a big hit with HH as well!

Baked Turkey Non-Chimichanga Chimichangas 
Makes 8

3/4 lb Lean Ground Turkey
16 oz can Refried Beans
1 3/4 cup Salsa
4 1/2 oz Canned Diced Green Chilis
1/2 tsp Chili Powder
3 tbsp Diced Onion
1 cup Mexican Cheese
8 large Tortillas
Sour Cream, for garnish and topping as desired
Cooking Spray

Preheat oven to 350 degrees, and prep a glass 13x9 baking dish and a large skillet with a few sprays of cooking spray.

Add turkey to skillet and cook over medium-high heat until just browned, about 5 minutes.  

Meanwhile, wrap tortillas in foil and put in oven to warm and soften.

Add diced onions and continue cooking until onions are slightly translucent.  Drain any excess grease, though I find with lean turkey you do not have too much grease.


Add beans, salsa, chili peppers, and chili powder.  Stir and cook until heated through, about 3 minutes.  Stir in cheese and remove from heat.


Remove tortillas from oven, and put wraps together using a heaping 1/2 cup of the turkey mixture per tortilla.  Fold in ends and roll up.


Place in prepped baking dish.  As you can see, I was not concerned with keeping the size the same for all, but if you were planning to present these, you could be a little more careful when preparing the wraps.


Bake uncovered for 15 minutes.  Here is where you could extent the time if you prefer a crispier, more Chimichanga like taste.  Because I don't, I went for a softer texture and actually took them out just before 15 minutes was up.

I served mine with sour cream on top, and a side of Spanish Rice!

Sunday, June 23, 2013

Gevalia Makes Friends

This weekend, we had the pleasure of hosting Mother-in-Law Red and her fiance, Mr. Bear, over to our home for some yummy coffee, french toast bake, and a yogurt bar!  Obviously this was paired with fabulous conversation!


We were lucky enough to get to try some yummy Gevalia coffee for the first time, and it was a hit at our house!  Mr. Bear isn't a coffee drinker, but everyone else was raving about the yummy coffee!  HH, who prefers a flavored coffee, drank it black and said it was great!


This was the first time I've put together a yogurt bar, and I guarantee if you're coming to my house for breakfast or brunch in the future, you'll see one there.  I had vanilla and strawberry yogurt; and strawberries, blueberries, bananas and granola as toppings.


I made a new recipe for our breakfast get together, which turned out fantastic!  We were too busy scarfing it down to remember to take a picture, but you can find the recipe HERE.  Take my advice, and make it ASAP!

I love hosting people in my home.  It was one of the things I most looked forward to during our Home Buying journey, and I am happy to say that nearly a year later, we have made a lot of memories here in our home.  I can't wait to continue having friends and family in our home over the years, and continuing to make more memories with them.

After our lovely breakfast and some catching up, we headed to our next fun event of the day - we went to the beach to take some pretty photos of MIL Red and fiance, Mr. Bear!  Their wedding is coming before we know it - less than a year, now!  We took some photos to remember this special time in any couple's life, and they might just get some use of them for wedding stationary!  HH was a lovely helper, holding my camera bag and MIL's purse, and even doing some sand-sketching for some creative photos!  I'll let MIL decide when she wants to share these photos (spoiler alert: they turned out so cute!), but here is a picture of my very helpful and Handsome Husband!


All in all, a very successful and joyful Saturday!  

I was selected for this opportunity as a member of Clever Girls Collective and the content and opinions expressed here are all my own.

Thursday, April 4, 2013

Adventures in Pinterest: Easter Treats

Sometimes I wish I was one of the fabulous bloggers who thought out all their holiday crafts, recipes and decor; made them in advance and took the most gorgeous photos; and then shared their amazing ideas with their readers inspiring them to use their creativity to make their holidays even more special than years past.
 
But I'm not.
 
I'm just a girl who likes to ramble, who sometimes make some recipes and crafts and shares them on the blog.  And most of the time, if they're for a holiday?  I'm sharing them after cause I just made them that day.  Such is life.
 
This Easter, I made two adorbs treats to share with our family.  And shocker of all shocks?  They were both Pinspired.
 
Colored Easter Deviled Eggs
  
Pinspiration: 

Mine:


I sort of love how mine got this random speckled look, though I'm not completely sure how they did.  I'll refer you to the original link for the instructions, but I used about a cup of hot water, combined with about a teaspoon of vinegar and a very small amount of Wilton gel colors.  I do not have liquid food color in my house, and the gel worked just fine.  The only thing I would note that was a bit different than the original link is that I left mine in the colored water for much longer than I thought I would.  Maybe it was because of the gel icing?  Anywho, I left them in the cups of colored water for 3+ minutes each.

And just because I know everyone does it a little differently, my yolk mixture is pretty basic: egg yolk, light mayo, garlic salt, Tapatio, and dijon mustard.  

After the appetizer came a wonderful dinner full of steaks, crab legs, homemade coleslaw, green bean casserole and more!  And after that, came these:
 
Easter Nest Cupcakes
  
Pinspiration:

Mine:
 
Shout out to HH for being a hottie hand model! 

I'm gonna keep it real and admit that I used gasp box cake mix, canned frosting and obviously premade candy atop these little cuties, and you know what?  No shame.  These are very basic, and the instructions at the original site are super helpful! 


Friday, October 26, 2012

Cooking with Casey: Beef and Noodle Stir Fry

I'm pretty proud of myself for this one, guys.
 
I took a recipe, didn't have/couldn't find some things listed in it, and turned it into my own thing!  When I explained that the Handsome Husband, his response was "What are you, a cook, or something?" - my husband, he's just got a way with words.
 
You can see the original recipe by the one and only Pioneer Woman HERE.  Below is the recipe I used, including all my changes.
 
Beef and Noodle Stir Fry
Serves 4
 
I got way too much joy out of setting up this photo.
 
1 1/2 lb Flank Steak
1/2 cup Low Sodium Soy Sauce
4 Tbsp White Wine (I used Pinot Grigio, an uuber cheap bottle)
2 Tbsp Packed Brown Sugar
2 Tbsp Cornstarch
Garlic Powder
2 Tsp Chili Sauce
Canola Oil
1 Medium Sweet Onion (I prefer sweet onions, so I always use them)
2 Red Peppers
1 Tbsp Diced Jalapeno (I used a can, sister don't dice jalapenos in this house)
Anthony's Cut Fideo Pasta
 
Start by putting together your marinade/sauce that you will soak flank steak in by combining in a medium bowl: soy sauce, white wine, brown sugar, cornstarch, garlic powder (the original recipe calls for garlic cloves, but I am both lazy and cluless, so I simply use garlic powder and on this occasion, I probably used about a teaspoon?) and chili sauce.  Set aside.
 
Thinly slice flank steak.  I cut mine in half lengthwise, and then sliced, so my pieces were not too long.
 
 
Place flank steak slices in sauce and toss to coat.  Leave steak slices in sauce and set aside.
 
Dice onion (I prefer very small pieces, but if you like slices, that would work great too!), and slice red pepper into small rings/slices.
 
Heat about a tbsp of canola oil in a large skillet over high heat.  Once hot, add onions and sautee for about a minute and a half.  Remove onions and put in medium bowl.
 
Return skillet to flame, and allow to get hot again.  Add pepper slices/rings and cook for about two minutes - until peppers have some black and brown but are still firm.  Remove peppers and put on top of onions in medium bowl.
 
Return skillet to heat and add another tbsp of canola oil.  Allow to get hot again and, using tongs, add a chunk (you're welcome for the technical lingo) of the steak from the sauce.  Spread the slices of steak out in the pan and sear on each side for 20-30 seconds.  After both sides have been cooked, put on top of peppers and onions in medium bowl.  Continue until all meat has been browned.
 
Now would be a good time to put your water for noodles on to boil. 
 
Lower heat for skillet to low, and add back your bowl full of meat, peppers and onions.  Top with leftover marinade that steak was soaking in.  Let simmer while the liquid thickens.
 
 
Once water is boiling for noodles, add noodles and cook per package instructions.  (I used about 3/4 of the package, because I am a huge noodles fan, you could use less.)  Once noodles are done cooking and drained, add to stir fry mixture in skillet.  Mix to warm everything up one last time, and you're done!


Wednesday, September 19, 2012

Cooking with Casey: Baked Halibut

One of my Handsome Husband's coworkers has a boyfriend who loves to fish.  And she is super generous and share some of the fantastic fish that he brings home, so a few weeks ago when HH brought home this halibut, I knew I could find a fantastic recipe to use.  And lucky for him, I like my fish raw, so he had it all to himself!  (Wouldn't you know it, the dude was so excited to take it to school for lunch, and left it there before even eating it!  One of his law school buddies lucked out with a yummy fish lunch instead of HH!)

Panko Baked Halibut with Mustard
Original recipe from HERE, slightly modified version below
Serves 2
 
2 large halibut steaks
1 1/2 tablespoons Dijon mustard
1/2 stick unsalted butter, melted
1 1/2 cups Panko bread crumbs
Salt and pepper, to taste
1 lemon
 
Preheat oven to 375.
 
Combine mustard and melted butter in shallow bowl. 
 
Dip halibut steaks into mustard mixture, leaving them for 30-60 seconds to soak up the mixture.
 
I spread my Panko crumbs in a pie pan, and used that to coat the steaks in.  Place the steak in the crumbs, turn over and be sure to liberally coat the entire halibut steak.
 
Place steaks in a pyrex baking dish (I just used a 9x9, but you could use a baking sheet or another sized pyrex, I suppose).
 
Season with salt and pepper, and put into oven.
 
Bake for 20 minutes.
 
After removing from oven, squeeze about half of a lemon onto the tops of the steaks, and serve with lemon slices.  I served mine over rice.
 
 
This recipe got rave reviews from HH and his law school buddy - let me know if you try it!
Also, my guess is that it would work with many other kinds of fish.


Wednesday, August 8, 2012

Adventures in Pinterest: Funfetti Cake Batter Cookies

When we were invited to Cute Apartment's beau's house for a Breaking Bad premier viewing party, I knew I would bring a dessert.  The idea of something resembling meth popped into my head, but was quickly replaced by these cookies (sprinkles just do it for me, what can I say?) when I saw them on Pinterest.


The original recipe is from Cookin' Cowgirl, so please go check out her site and see some other fantastic recipes!

I gotta be honest and admit that I'm not entirely sure why these are called Funfetti Cake Batter cookies, in that you don't really use Funfetti Cake Mix, but I'm thinking it sounds cute so I'll go with it.

Check out the recipe below, just slightly modified from Cookin' Cowgirl's original creation.

Funfetti Cake Batter Cookies
Yields 2-3 dozen cookies, depending on size

1 box yellow cake mix
1 tsp baking powder
2 eggs
1/2 cup vegetable oil
3/4 tsp vanilla extract
3/4 cup sprinkles

Preheat oven to 350°.

Mix cake mix and baking powder.

In another bowl, beat together eggs, oil and vanilla.  Add this mixture to cake mixture.

Stir in sprinkles, one 1/4 cup at a time. 


Drop in spoonfuls onto lightly greased cookie sheet.


Bake for 8-12 minutes (shorter time produces much softer cookies, bake per your preference!).

Ta-Da!


Linking up at these fabulous blogs: The Vintage Apple, Something Swanky, Vintage Wannabe, Ginger Snap Crafts, I Heart Nap Time, Lil Luna, A Diamond in the Stuff, Live Laugh Rowe, 504 Main, Be Different Act Normal, Tatertots & Jello, Six Sisters' Stuff

Wednesday, July 11, 2012

Adventures in Pinterest: Hippie Juice

Have y'all seen this pin out there in Pinterest land?


Apparently, this magical concoction is called
Hippie Juice.

I don't totally know where the name from, because if I was naming it it would be more like: Magical Tasty Vodka Rum Punch Juice.  But maybe that's not why I'm in Marketing anymore.

This seemed like the perfect cocktail to make and bring to our good friend Twin Navy's going away party, because you guessed it our buddy is off to boot camp for the Navy!

One busy weekend last month we all got together to wish him well on his journey, and do a little incognito beach drinking in sunny San Diego, and this cocktail made the trek down from OC with Handome Hubster and I.


It was real easy to whip together, and a big hit with those at the going away fiesta.

For those of you who like real fruity drinks where you can't taste the booze?  This is for you!

The recipe:
4 scoops Countrytime Pink Lemonade Mix
Water
6 strawberries (I added more the original recipe) - cut in fourths
1 cup Smirnoff Watermelon Vodka
1/3 cup Triple Sec
1/3 cup Malibu Coconut Rum

Check the original source for directions, but basically you stir your ingredients together and you're ready to party.

The only thing I will change next time (and forgive me if this makes me sound like a lush) is up the alcohol content - it literally tastes like juice!

So the final consensus?
We were all fans,
especially me.


Follow Me on Pinterest

PS - Click that cute lil P up there ^^ to Follow Me on Pinterest!


Monday, April 16, 2012

Easter Rainbow Cupcakes

It has been way too long since I've shared a recipe with, y'all, hasn't it?!  I have a good one for you today!

I made these sweet cupcakes for Easter Sunday, and they were quite a hit!


So cool looking, right?!

I got the recipe and instructions from Kevin and Amanda, so I am going to direct you right on over to their page for the deets!  But here are some photos of my process!

Note: I did use the frosting recipe they recommended, but did not make the cake from scratch.  I actually prefer cake box cake...I'm weird!

I used these Wilton icing colors: Christmas Red, Cornflower Blue, and Lemon; mixing them to make the green and orange shades.


I split the batter into 5 bowls, tried to make it as evenly divided as possible, and used the 3 colors to make the 5 colors I wanted.


 Spooned the batter into the cupcake liners, about 2 teaspoons of each color in each liner.  Popped those suckers in the over, whipped up some amazing vanilla buttercream, and voila!

Monday, November 21, 2011

{Plenty to be THANKful For} I'm THANKful for my Favorite Thanksgiving Recipe!

Manic Mother
 
Today's Topic:
 
I'm THANKful for my Favorite Thanksgiving Recipe!
 

I have a totally easy, completely favorite Thanksgiving recipe that unfortunately (or fortunately for me, cause it's my fave) not everyone loves.  I think it just takes a certain taste to appreciate this masterpiece.

 Nanny's Fruit Salad
Also known as Ambrosia

This is not a photo of MY fruit salad - mine is cuter.

Ingredients:
1 large can pineapple chunks, drained
2 cans mandarin oranges, drained
1 half-jar of maraschino cherries, drained and halved
4 banannas, sliced
3/4 large bag of miniature mashmallows
Sour cream, to preferred consistency

It's all very simple, you put all fruit in a bowl, add your mashmallows, and add sour cream until you like the consistency.  I prefer mine pretty firm, as the leftovers get...mushier with time.  The key to this fruit salad is draining the fruit as best as possible - it will pay off in the end!

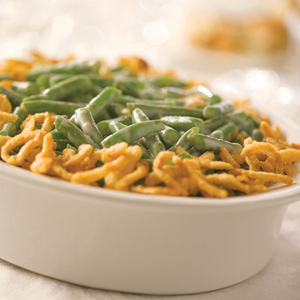
Also, another thing I love love love to eat on Thanksgiving (and I am not a huge fan, as I mentioned on Thursday) - Handsome Husband's Aunt Fancy Chef's Green Been Casserole!

Again, not her actual casserole.

I've tried my fair share of green been casseroles and hers is by far my favorite ever!  Last year we missed dinner and only came for dessert, and she even sent me off with my own container full of the good stuff!

What's your favorite Thanksgiving recipe?


Miscellany Monday @
lowercase lettersMingle 240

Wednesday, June 22, 2011

Quick and Easy AMAZING Fruit Dip Recipe

Over Memorial Day weekend last month, we went to a BBQ at the Lake to celebrate Twin Unicorn's Homecoming.  It was potluck-style, and Handsome Husband and I brought a few things - one of which being this awesome fruit dip.

The first time I ever had this dip was when my Aunt Kathy* made it.  My Aunt Kathy passed away nearly two years ago now after a brave long battle with cancer, and I think that has a little to do why I love this dip so much.  I also just love it because it is seriously AMAZING - just like everything Aunt Kathy made.

This dip is so quick and easy, and so tasty!  I could (who am I kidding?  I do) eat this shizz by the spoonful!

Sweet Cream Cheese Fruit Dip
Yields ... uh, about the amount you see in the photo above.  
This recipe isn't about exact measurements.

2 8-oz blocks of cream cheese
1 large size jar marshmallow creme or fluff
1/2 regular size container of whipped topping (I use generic instead of cool whip...dare you to taste the difference)

Allow cream cheese to soften to room temperature.

With hand or stand mixer, blend cream cheese and marshmallow creme.

Slowly fold in cool whip.

Voila!  SO easy - the time consuming part is cutting up the fruit.  Which is why, if you're me, you make the dip and you make your husband cut up the fruit.  Teamwork = dreamwork.

*My Aunt Kathy was not even a blood relative of mine, but from the moment I met her she felt like family and I couldn't help but claim her as part of my family.  More on her, and my other Delaware family another time.

Tuesday, May 10, 2011

Strawberry Margarita Jello Shots ... in Strawberries!

While brainstorming on what kind of (alcohol-themed and edible - she's only 2 years post 21!) gift to give to Best Friend Swagger for her 23rd birthday last month, I came across these jello shots - and I was immediately sold!  (PS I am totally almost embarrassed to show her link and follow with my pictures, hers are AMAZING and mine...not so much.  But they tasted great!)

These were surprisingly easy, and I definitely plan to make them again soon - anyone have an occasion?

I made one change to the recipe at the link, due only to the fact that I had no Cointreu, and I also was in a hurry and didn't ice the tequila before adding it to jello on the stove - turned out fine, so I'll be posting the version I made below!

Strawberry Margarita Jello Shots
Yields 25-30 strawberry shooters

1 box Strawberry Jello - not generic brand
5 ounces tequila

First, start by cutting off the "pointy" ends of your strawberries, so that they will stand upright on their own.  Works best to use the biggest and freshest strawberries you can find!  Be careful to cut the minimum amount possible to ensure there is no hole in the bottom of the strawberry - we'll talk about this later.


Use a melon baller to empty out the strawberry.  Don't get too close to the sides, because if you make a hole in the side of the strawberry you won't be able to use it for these shots - it'll just have to be a mid-prep snack for you, instead!


Again, check the strawberries for holes in the bottom or on the "walls" of the berries - any of them will holes will need to be discarded (again, please indulge - you need your sustenance!).


Now - to prepare the jello.  Boil one cup of water in a small saucepan, and add jello and whisk until completely dissolved.  Turn down heat, and let sit while preparing alcohol mixture.
Combine 1/4 cup cold water with 5 ounces (2 1/2 double shot glasses) of tequila.  Add cold mixture to hot jello mixture on stove.

After everything is mixed well, pour jello mixture into your newly made "shot glasses" and put in fridge overnight.


Now, this is where we're going to get real.  Remember where I prefaced that it was very important to use only strawberries without holes in them?  Well, I didn't.


And this is what I woke up to in the morning.  So next time (and you're lucky enough to learn from my mistakes!), I'll be heeding my own (and Bakers Royale's) advice!

Bakers Royale suggests rimming your strawberries with salt at this point, but I have a serious problem with salt in margaritas, so I abstained.

I still had about half of my originals viable though, and that worked for me!  I have to say display was severely lacking due to the fact that I take a completely inappropriate amount of time to get ready to go out.  


These tasted so good - you could not even taste the (relatively cheap) tequila in them, and it was so fun to get to actually eat your shot - "shot glass" included!
Related Posts Plugin for WordPress, Blogger...